How to Take Better Photos with Your iPhone? Edit Photos Like Pro
Are you wondering how to take better photos with your iPhone? In that case, you’re at the right place. In this digital age, everyone has a handy mobile phone with cameras having different qualities. But of all, it’s the iPhone that wins for its clear and HD results.
However, to get the best from it, you must know the art of capturing professional pics. Anyone can simply launch the camera app, point at the object, and shoot, but there’s much more to it when you are seeking HD outcomes. It might seem complicated at first, but once you practice, no one can stop you from becoming a favorite photographer of all.
So let’s not waste our time and start our discussion on how to capture better photographs, as we aim to explore pro tips to do so. We will also shed light on top-notch iPhone camera features along with a few photo-editing practices followed by professionals in the field.
How to Take Photos on iPhone Like Pro?
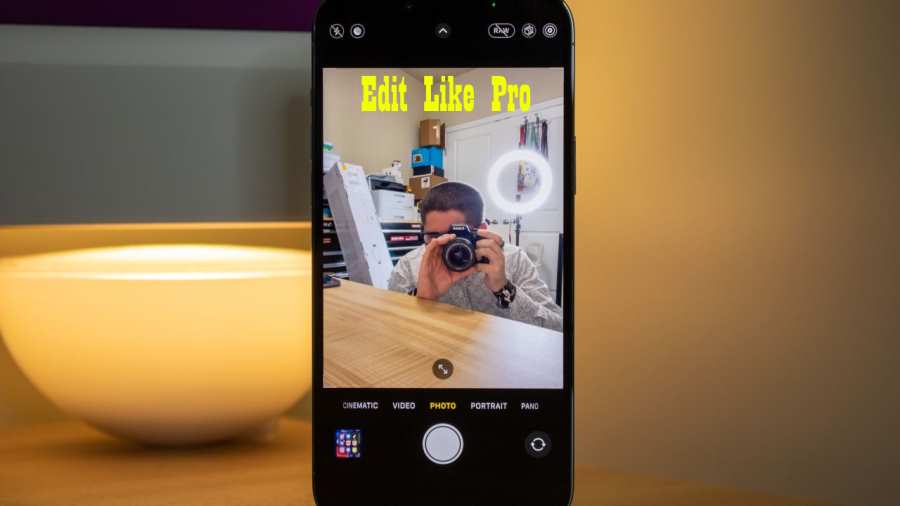
The tips we shared above state how you can improve your image-capturing capabilities by following a few guidelines. However, in this section, we will share a few iPhone photography features which play a vital role in enhancing the quality of your captured images and take photos like pro.
1. Try Portrait Mode Creatively
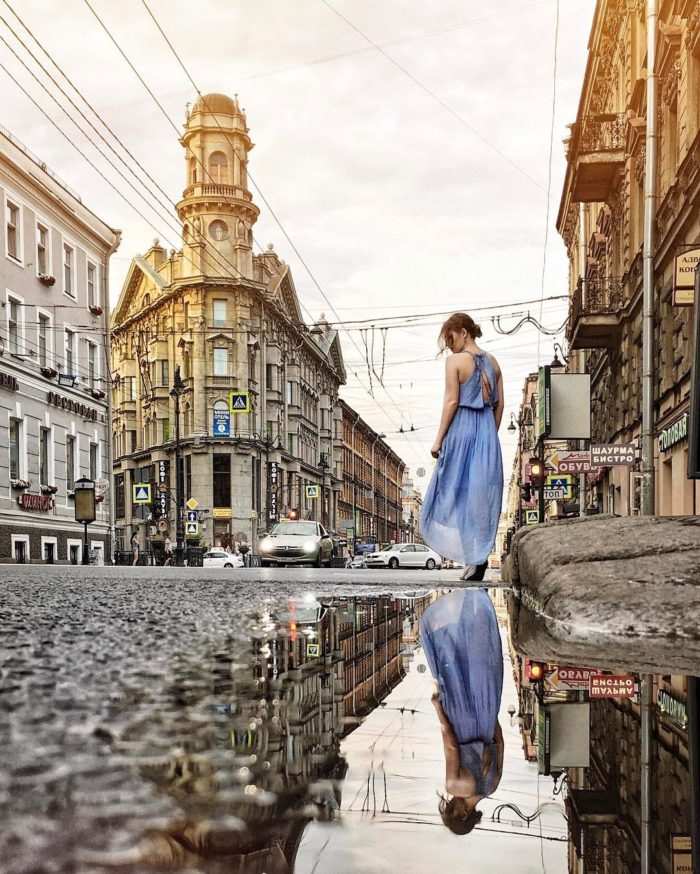
As you launch the camera on your iPhone, you’ll see the portrait mode on the bottom toolbar. Simply click on it to capture images with intricate details and maximum focus on the subject. In this mode, the background appears blurry yet soft.
Upon lining up the shot, you can also get auto recommendations by the application to better adjust your subject into the frame. You can also play with the zoom, flash, and depth field of the image by clicking on the F stop sign.
Moreover, the app lets you adjust the blurriness of the image. You can simply move the slider located on the bottom to interpret how out of focus you want the background to appear. Another explore-worthy option is the lighting effect from where you can apply different tones, including:
- Contour Light
- Stage Light
- Stage Light Mono
- High-Key Light Mono
- Studio Light
- Natural Light
In fact, you can change the effect even after capturing the picture if you don’t like it.
2. Explore Pano Mode
If you want the photographs to appear as a panoramic shot, start getting familiar with your iPhone’s Pano mode. Select it from the bottom toolbar and slowly move your device along the scene you want to store in the camera.
Now tap the shutter and align your phone’s movements as shown on the screen till the end. It’s important to perform this step carefully, as a minor mistake can make the picture appear distorted. If you follow precisely through the horizontal line, your landscape-styled photo will be ready to grab several compliments.
3. Use the Photo Mode
Although basic, you can capture perfect photos with an iPhone photo mode as well. For this, you just need to open the camera and the default mode is this one. To zoom in on the object, click on preset optical settings that appear on the screen. You can also leverage the built-in zoom by pinching the screen through your fingers or vice versa.
4. Leverage Night-Mode
In low-light conditions, it’s complicated to achieve high-quality captures. However, not anymore if you own an iPhone model above 11. These devices come with a Night Mode, which can make photography a breeze when little light is available in the background.
The best part is that you don’t need to navigate through Settings to activate this option. Whenever the camera detects such an environment, a moon icon appears on the screen, indicating activation of the Night Mode. But how does this feature function?
The iPhone basically prolongs the shutter for a few additional seconds than usual. Due to this, the lens can attract better light leading to a brighter image. You can also spot a number next to the moon icon, which tells how long you should hold the phone after pressing the shutter.
You can also set the exposure duration by tapping the sign and sliding the vertical line on the scale that appears on your screen. The duration can vary from one second to as long as half a minute. The latter is suitable when your device is on a tripod.
5. Macro Control the Images
You might underestimate the photo mode for its basic capabilities. But in the models above, iPhone 13 Pro, it features macro control with which you can capture tiny objects up and close, that too in high quality.
To check if your device is compatible with this feature, look for a yellow flower icon that may appear on your mobile camera’s screen. You can turn it off to check how much of a difference it makes while capturing small items into the camera’s eye. You can also enable this option by visiting Camera Settings, just as above, if the icon is not found.
6. Capture a Time Lapse Video
You may not know much about this iPhone feature, but the time-lapse is a great way to show your photography skills. You can shoot videos through it that appear in a fast-forward mode in the final results.
You can capture the beauty of the weather through this option or even the scenery as you drive through a road. However, for this you will need a tripod as the phone should be in a still motion throughout the capturing session.
iPhone Photo Editing Techniques
Capturing a good shot from your iPhone camera is merely a small part of becoming a skilled photographer. These days, editing them like a pro is equally crucial to transform your snapshots into a clear masterpiece.
Here are a few key tips for editing photos like a pro:
1. Create a Unique Style
Developing your own photo-editing style is more crucial than you might think. But with millions of professional photographers, it’s difficult to carve a style that stands out. For that reason, you should craft a photo-editing style that makes your photos easily recognizable. Here are a few ideas found on the iPhone which you can mix and match to create something unique.
- Orton Effect – a soft and silky look that conveys a mysterious or romantic mood.
- Color Calibration – adjustable to provide various hues and saturation.
- Faded – vintage color graphics that look washed-out
- High Dynamic Range (HDR) – vibrant and lifelike style with in-depth contrast
- Selective Focus – it emphasizes selective areas
2. Choose Custom Settings For Composition
If you want to align the subject and scenes better, visit Camera Settings to turn on the Grid option. This will make grids appear on the screen as you capture the image, allowing perfect alignment. Similarly, you can also activate the Mirror Front Camera option to capture non-reversed selfies.
From this section, you can also select Lens Correction to avoid distorted outcomes as a result of using wide-angle lenses. This especially happens with front cameras. And if you have an iPhone model above 11, then you can also view things outside the frame to better evaluate the objects to be added by activating the View Outside the Frame option from Settings.
3. Utilize a Photo Editor
To edit with ease, you need a photo editing program with an intuitive interface. However, with so many options available in the graphic design industry, it’s a bit difficult to find the right one. But don’t worry; we have listed below some affordable yet quality photo-editing services.
- Lightroom – best for temporary use
- Photoshop – best for quality editing
- Luminar AI – best for long-term usage
- GIMP – best for users who want a free alternative to Photoshop
4. Correct Chromatic Aberration
Commonly, chromatic aberration is a prevalent annoyance in all forms of optics, and pictures are no exception. You can recognize this nuisance as a mix of purple and green colors that outlines dark edges in a high-contrast display.
You can remove CA in almost every photo editor with a single click. However, sometimes it’s just too much that it won’t go away with such tools. In that case, you have to remove it manually with a few sliders in Adobe Lightroom.
5. Increase the Exposure
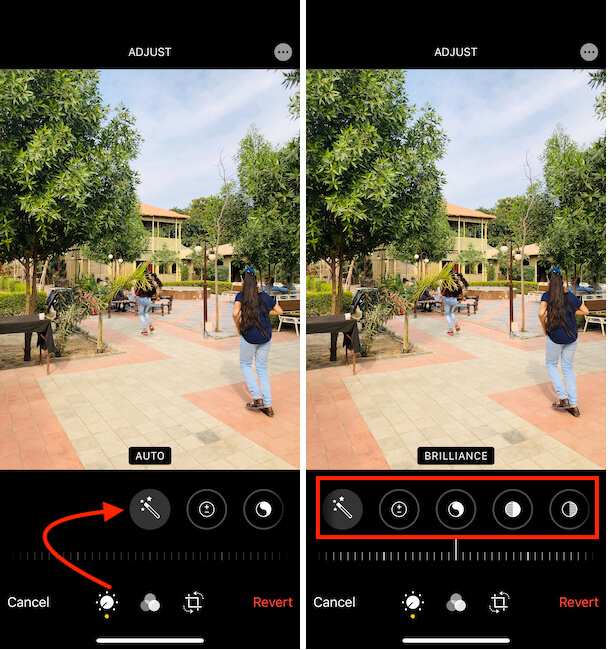
To ensure your image stands out amongst all, digitally and in print, you must keep the right amount of brightness. It should not be too low to appear dull and not too high to bother the eyes.
To do so on an iPhone, you must first place the picture in edit mode. Then, tap the adjust tab in your device’s camera roll. You will see two icons of plus and minus which indicate increasing and decreasing the exposure, respectively. Although you should follow your gut while dragging the slider, doing so ⅓ or half the way up would be enough.
6. Instil Contrast
You must edit the contrast accordingly to illuminate details in your iPhone photographs and increase their depth. This editing technique helps you darken a few objects while highlighting others conveniently.
Just as exposure, the contrast feature on iPhone can also be accessed via the editing mode. This option is available under the adjust section as a circle that’s half colored. Simply start by applying it steadily, and stop when you think the desired outcome is achieved.
7. Enhance Colors
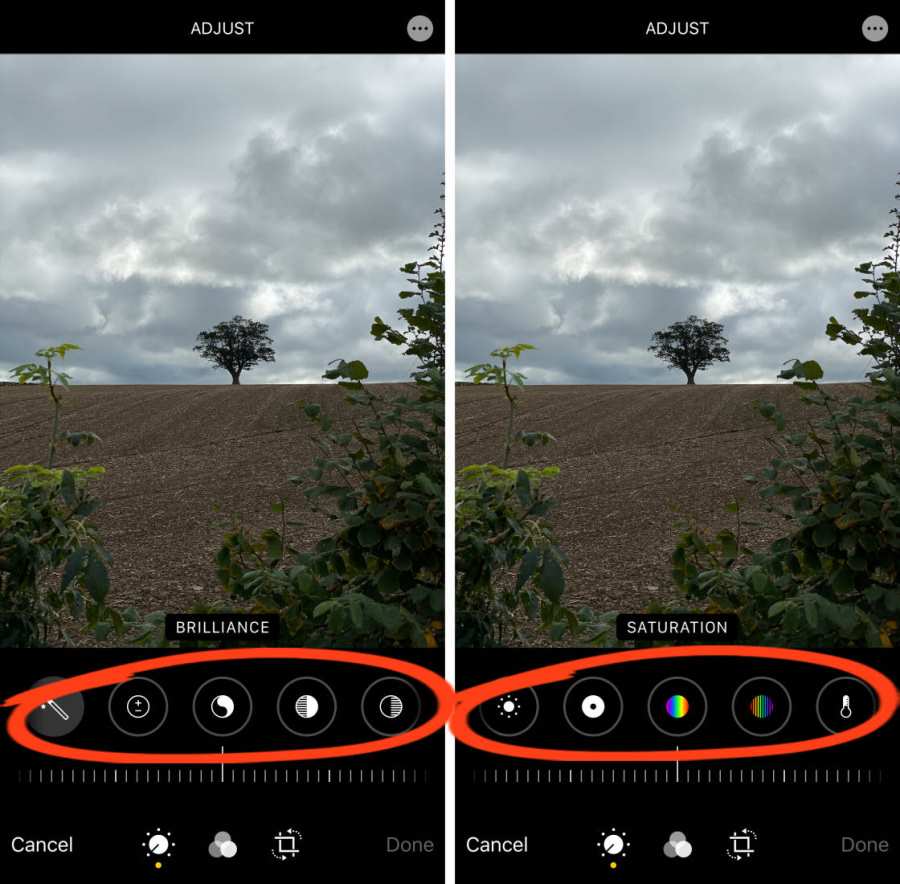
Vivid images are the key to grabbing maximum eyeballs. And you can achieve this via the saturation feature on your iPhone. The best part is that this feature does not destroy the real, natural essence of the image. However, you must still saturate the image moderately to achieve the best outcomes and not just over-modify it.
To access the saturation feature, visit the adjust section in edit mode and click on the round-shaped dial icon. There you can see a rainbow-colored circle by scrolling on the right, which is of saturation. Just like contrast and exposure, you can adjust it by sliding the scale.
Doing so backwards will add a muted effect on your image, while forward would make it more vivid. The choice is yours.
8. Crop the Image
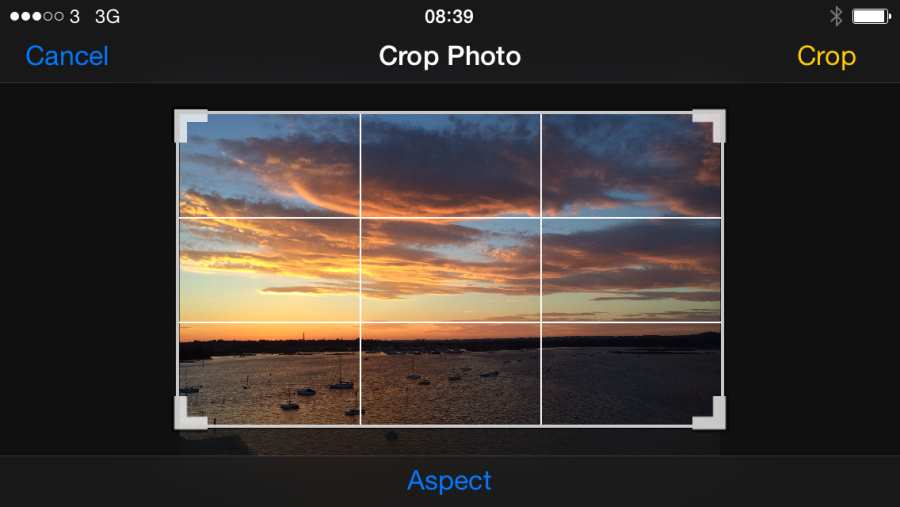
If you captured a profile picture-worthy image but aren’t uploading it because of too many distractions in the background, crop it. This iPhone editing feature has a lot of benefits than just eliminating unnecessary elements from an image. It also allows you to highlight the subject by creating space.
To crop, you need to visit the edit mode on your device and click on a square icon visible on the left side of the screen. It will let you drag the edges to crop freely. You must try a few different variations of cropping to get the desired outcomes.
Tips to Take Professional Photographs with an iPhone
Here are some tips which can help you capture HD images into the eyes of your iOS device’s camera.
1. Keep the Photos Simple
The very first trick on our list to help you capture professional photos with an iPhone wants you to appreciate simplicity. Although it’s common for photographs to have the temptation to include maximum details in their captured images, it’s not a good practice to do so.
In fact, such a scenario can easily distract the viewer, stealing away the real essence of any photo. Precisely, you need to ensure that you include only one or two subjects in your photographic product and let your iPhone camera do the rest. The fewer the objects, the more attention a picture will grab.
In fact, an image with an 80% empty background is also not a bad idea. It’s regarded as the negative space, which ensures the subject shines without anything else overshadowing the concept of your captured art.
2. Prefer Low-Angle Shooting
The angle from which you take photographs on your iPhone matters the most after your object. Therefore, you must know the right technique to excel at it. It’s a common practice for beginners to capture at chest height, but this does not bring the desired attractive results.
Although it’s highly convenient to do it that way, you must exert a little to capture high-quality and creative photos. Of course, you need to get out of your comfort zone, or else there’d be no difference between your product and that of an average photographer who randomly clicks their images as time pass.
The different perspective that we are talking about here is to shoot from a lower angle. Here’s why you should prefer it:
- Your photos will look intriguing
- The viewer will get to see the object from a fresh perspective
- This lets the sky grace your photograph with no unwanted distractions in the background
- You can also include intricate details of the foreground
3. Go For Silhouette Photos
If you want to explore the photographer inside you, it’s best to leverage the iPhone’s silhouette feature. In this, you can capture the dark shape of any object against a bright background, making it appear highly prominent.
Such types of photos have the potential to grab thousands of likes on social media. You can try this on your loved ones while on a seaside trip. The trick is to shoot toward the light to get the best outcomes.
To ensure HD photos, you can also activate the iPhone focus option and make sure to keep the exposure low for a dark outlook. You can also use an editing app for further darkness if desired results aren’t achieved.
The best time to try this photography technique is sunset or sunrise, as it’s when you can get the perfect amount of light with the sun’s position at a low horizon. The different colors of the sky, from orange to yellow and blue, will further enhance the beauty of the output.
4. Ensure Using Right Orientation According to the Subject
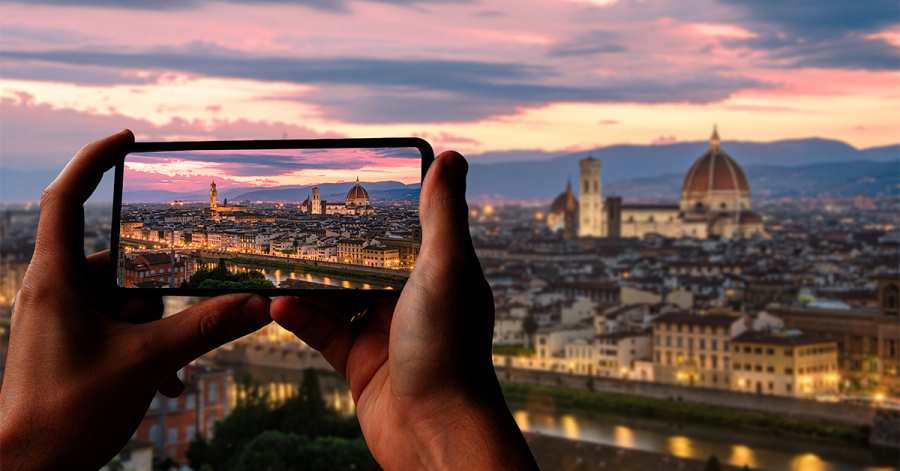
Sometimes choosing the wrong orientation can spoil a picture that could’ve come out much better otherwise. That’s why you must know which orientation from portrait or landscape will do the best, depending on the subject you’re trying to capture. The former is available on the bottom toolbar in the iPhone camera and works fine for single-subject images to keep 100% focus on it.
Meanwhile, landscape orientation is ideal when you are shooting multiple objects in a frame to cover them all creatively. Since it’s horizontal in frame, there’s more room for elements you wish to add.
Besides this, you must also consider the social media platform where you want the image uploaded. Each one has different requirements. For example, portrait mode is best for uploading on Instagram stories, while landscape can ideally suit Twitter better.
Wrapping Up
In conclusion, taking better photos with your iPhone doesn’t require expensive equipment or technical know-how. With a few simple tips and tricks, you can elevate your iPhone photography game and capture stunning images that you’ll be proud to share with others.
Whether you’re an amateur or a seasoned pro, these tips can help you take your iPhone photography to the next level. So go ahead and grab your iPhone, and start capturing the world around you in all its beauty!


