
March 20, 2019
Design
5 Questions about Macro Photography for Beginners Answered
Browsing through hundreds of macro photographs of flowers and insects, you can’t help marveling at the small details captured by these stunning photos. Getting into macro photography blogs suddenly crosses your mind, and now you wonder how to get started. Before you do that, I’ll let you in on some of the common questions that first-time macro photographers ask and the corresponding answers.
Are close-up shots also considered macro shots?
Macro photography means different things to different photographers. But in simplest terms, it is the art of making small objects look big.
It should not be confused with close-up photography. Macro photography is essentially close-up photography, too. But not all close-up photos can be considered macro. The distinction between the two is in capturing the finest details of the subject (e.g., the patterns on a butterfly’s wings, the hair on an insect’s face, etc.). Macro photos, though essentially close-up shots, show details that are invisible to the naked eye.

Image Source: Pixabay
Close-up photography entails shooting an object in close range so that it fills the frame, while macro photography magnifies the object from half life-size to five times life-size, as represented on the image sensor of the camera.
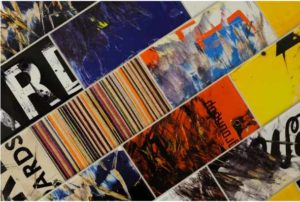
Another common misconception about macro photography is that it’s all about insects and flowers only. There’s also what is called abstract macro photography that captures textures, patterns, shapes, or colors of an object and making these small details the focus of the image. The image below, for example, creatively shows a pattern of colors as seen through a water drop.

Image Source: Flickr (Photo by aotaro / CC BY 2.0)
Is a smartphone or a point and shoot good for macro photography?
Taking great macro photos is possible with practically any camera type and model. No need to go for a high-end equipment just yet!
Case in point: the stunning macro images shot with a Samsung Galaxy S4 by Nairobi-based photographer Abdul Mutuma. These images he took with the help of a DIY macro lens that he built from his broken point and shoot.
If yours is an iPhone, you can start your macro photography journey with the help of a lens kit and other accessories. To learn how to do it, watch this helpful video tutorial.
Each camera type has its pros and cons. The right equipment for you depends on your needs and preferences.

If you’re a first timer, I would advise you start practicing macro shooting with a smartphone camera or a point and shoot. Once you get the hang of it and you feel you’re ready to go professional, then use a DSLR with a macro lens.
Editing images is a crucial process to enhance their visual appeal and communicate the intended message effectively. It involves adjustments like color correction, retouching, cropping, and resizing to achieve the desired outcome. Skilled editors use software tools to manipulate elements, improve clarity, remove imperfections, and create captivating visuals that leave a lasting impression.
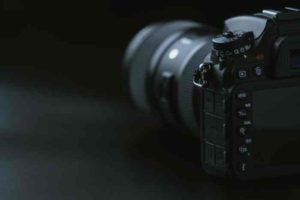
Which lens is best for macro photography?

Image Source: Flickr (Photo by Laineema / CC BY 2.0)
The best choice is a macro lens―it can provide you with sharp, perfectly exposed photos, and better working distance. You can also use this type of lens for various types of photography other than macro such as portrait and landscape.
However, if you don’t have a macro lens, it doesn’t mean you can’t shoot macro. Cheaper alternatives such as close-up filters, extension tubes, and reverse lens are available for beginners, enthusiasts, and those who find macro lens too expensive. Pittsburgh Camera Rentals is also another cheap alternative to rent lenses or any other video camera devices.
Is a tripod really necessary?
Of course! You’ll need a sturdy tripod that can keep your camera steady while you compose your shots. Shooting macro involves a very limited depth of field, and chances are the subject may appear blurry in photos with every camera movement. A tripod solves this camera movement issue.
How can I capture amazing macro photos?

Image Source: Pixabay
You can tell if a macro photo is perfect if its subject is the main point of interest and is composed well within the frame. Here are a few easy tips to achieve it:
- Choose a simple background. A busy background distracts a viewer from the subject, so free it from clutter.
- As much as possible, shoot in a controlled environment. Wind, moving objects, and anything that can move your subject will ruin your macro shots. If you really have to shoot outdoors, don’t do it when it’s windy.
- Work with natural light. Results are better with natural light than artificial light. When working with natural light, position yourself at the brightest angle for your subject.
- Figure out your desired depth of field. This involves adjusting your camera’s aperture depending on how much depth of field you want. If you want the focus only in certain parts of the subject, use a larger aperture to achieve a shallow depth of field. But if you’d like to put the entire subject in focus, use a smaller aperture (i.e., f/8 to f/16) to increase the depth of field.
- Use the manual focus. After you frame and compose your camera and the object, check the live view on your camera’s LCD screen and magnify, adjusting the focus until you get it where you want it.
- Be patient! Know that it takes hours to achieve the exact shot you want. You’ll have to change the position of the object and your camera a lot of times to find the perfect focus and composition.
Macro photography is exciting as it is frustrating (at times), but the results are absolutely worth it. I hope you’ll have a great experience shooting macro soon!

 January 18, 2024
Bilal Ahmad
Founder & Editor, TechMaish
Bilal Ahmad is the founder and editor of TechMaish, writing about consumer technology since 2008. For over 18 years he has covered streaming and downloads, games, social media platforms, iPhone and Android, Windows fixes and everyday software, testing tools hands-on and sharing what actually works. He is based in Peshawar, Pakistan.
About MeAll My ArticlesTwitterFacebookLinkedInInstagramPinterest