How to Burn Apple Music to CD on Windows/Mac
Apple Music, an auditory haven for IOS users, boasts an eclectic library and hidden gems. Yet, people often meet an obstacle when they want to burn Apple music to a CD. This is because DRM is shackling your tunes to the Apple ecosystem.
But fear not, dear readers. In this guide, we will help you burn Apple Music songs to CDs by removing Apple Music DRM and converting them to CD-compatible formats. So buckle up, and let’s embark on the journey to liberate your music!
Tools Required for Burning Apple Music to CD
As we all know, some preparation is a must. Before conducting the burning process, you should equip yourself with:
- You must have a CD Drive on your Windows/Mac (to pop in the CD).
- You will need a blank CD to save files.
- A CD burner is necessary. If there’s no in-built CD burner on your PC, you will need to buy an external burner to help you with burning Apple Music to CD.
- Last but not the least, you’ll need an Apple Music converter to remove the DRM from Apple Music and convert them to CD-compatible formats like MP3 and WAV.
A Necessary Step for Burning Apple Music to CD
Now let’s delve into an indispensable step for burning Apple Music files to CD: removing the DRM and converting songs into CD-compatible formats.
Time to bring out the Big Gun: MuConvert Apple Music Converter, your ultimate ally in the battle against DRM restrictions. With its lightning-fast 20x speed for conversion, MuConvert effortlessly transforms any DRM-protected Apple Music tunes and iTunes purchases into CD-compatible formats while retaining the song’s original audio quality.
Specializing in M4P DRM removal, MuConvert Apple Music Converter simplifies the process of liberating your liked songs. By integrating the official Apple Music web player, it allows users to log in, select songs, playlists, or albums, and swiftly convert M4P files to universally compatible formats including MP3, M4A, WAV, and FLAC.
Here’s a look at how this tool works to burn Apple Music playlists to CD in DRM-free files with high quality:
Step 1. Upon downloading the software, launch it. Sign in with your Apple ID on the welcome interface to access your library and use its songs.
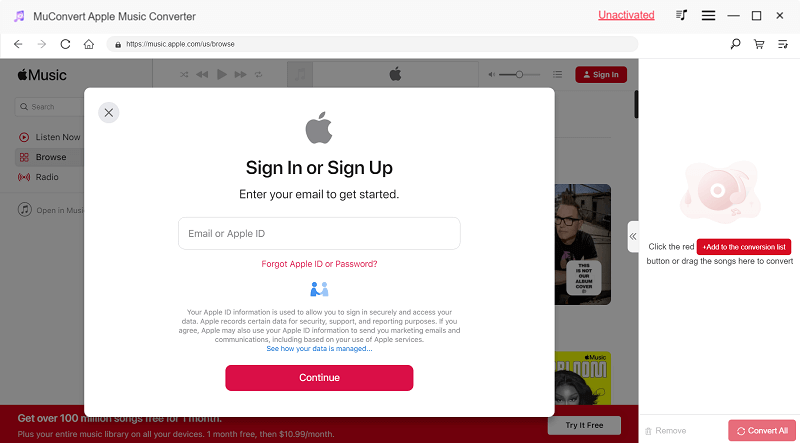
Step 2. Once logged in, browse through your library to find your desired songs, playlists, or albums.
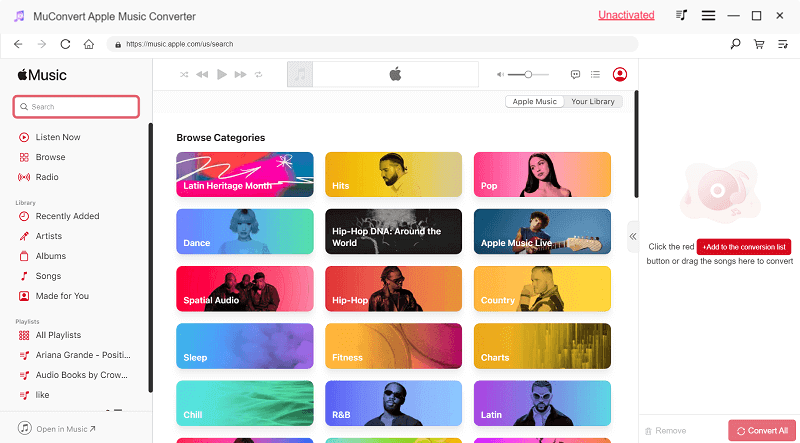
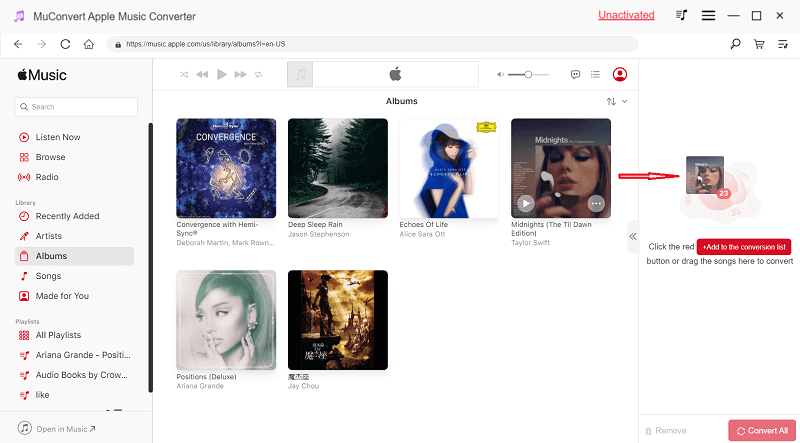
Step 3. When you locate the content you wish to convert, simply drag it to the + button located on the right sidebar for conversion.
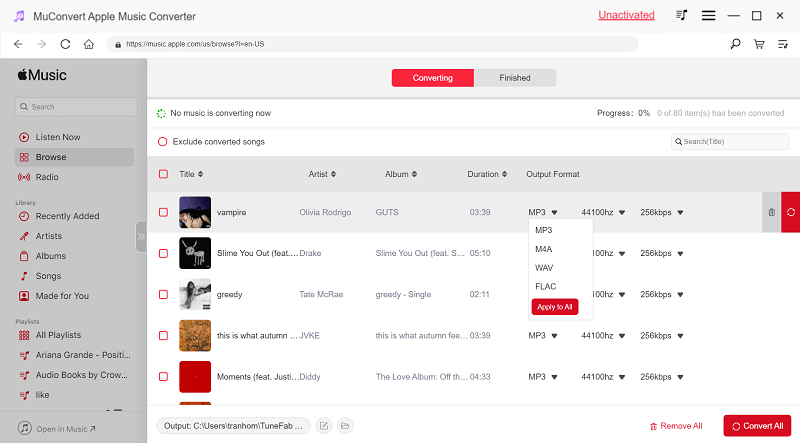
Step 4. Before initiating the conversion process, feel free to customize various parameters such as output formats, sample rate, bitrate, and designate the destination folder. We recommend selecting WAV as the output format for CD compatibility.
Step 5. Click on the Convert All icon to start the DRM removal and conversion processes. All selected M4P tracks will be converted to WAV with original quality immediately.
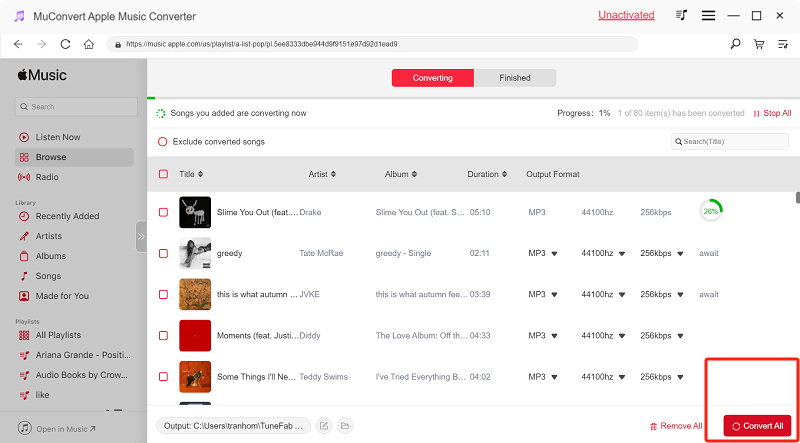
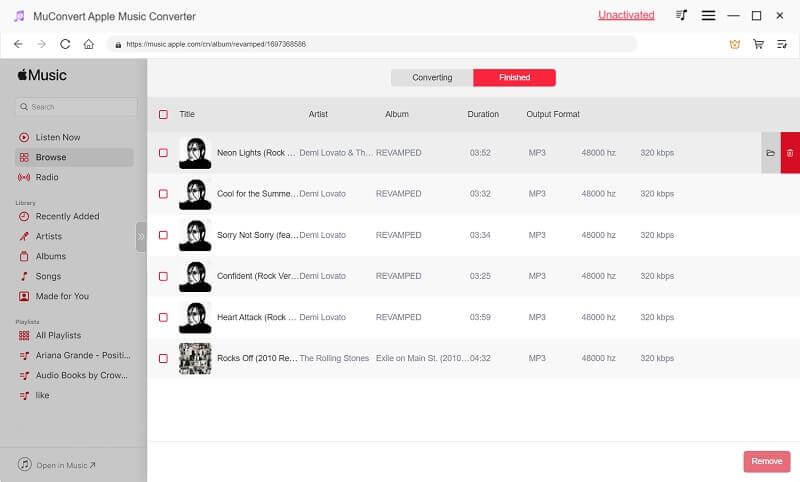
Step 6. Finally, check out the process by clicking the Finished button to ensure no tracks were missed. Additionally, you can click on the folder icon to navigate to the output folder and access your converted files.
Burn a CD for Apple Music on Windows
Now with these converted WAV files at your disposal, we can next burn these Apple Music songs to CD on the Windows system.
Let’s see what we should do:
Step 1. Begin by importing your converted Apple Music tracks into Windows Media Player. Simply head to the Playlist panel within Windows Media Player and create a new playlist by clicking Open.
Step 2. Once your playlist is set up, drag and drop your Apple Music songs onto the newly created playlist. Don’t forget to insert a blank CD into your computer’s disc drive.
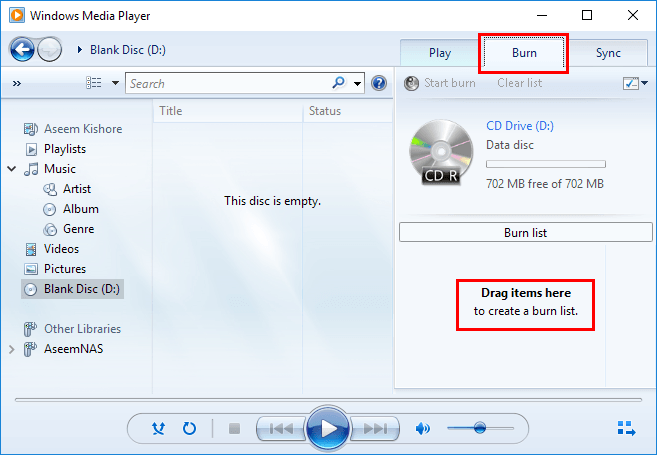
Step 3. Next, we can proceed by clicking the Burn button located in the top right corner of the interface. Then, drag and drop your newly created playlist onto the Burn List dock situated on the right side of the interface.
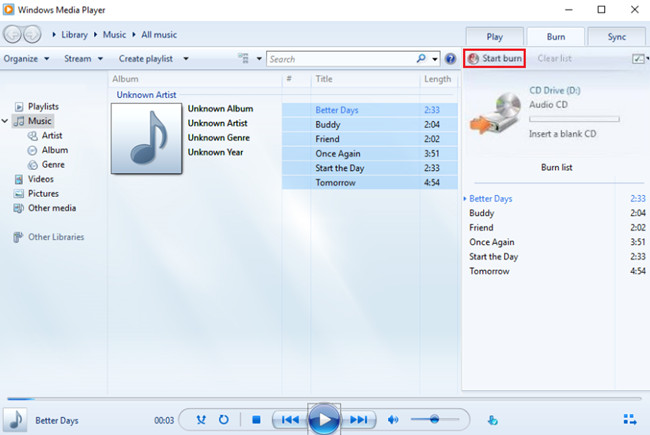
Step 4. Finally, opt for the Audio CD option from the menu and hit the Start Burn button to start the process of burning your Apple Music files to CD.
Burn a CD for Apple Music on Mac
Someone might wonder: What if I’m a Mac user? Can I achieve the same feat on a Mac? Relax Mac users, I got you covered.
Now let’s unveil the secret of burning a CD for Apple Music on Mac:
Step 1. Open the iTunes app on your Mac
Step 2. Upload your Apple Music files to iTunes by selecting File > Add File to Library or Add Folder to Library, then find and add your desired tracks.
Step 3. Choose Music from the pop-up menu at the top left corner, and then create a playlist comprising the songs you intend to burn onto the CD.
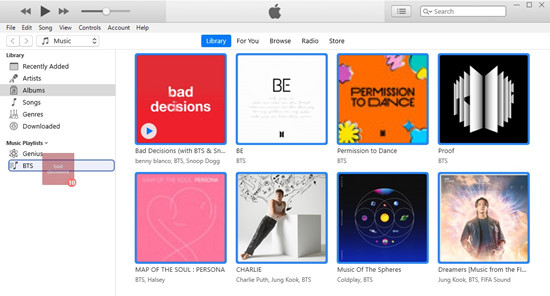
Step 4. Insert a blank CD into your computer’s disc drive, and then select the playlist, File > Burn Playlist to Disc.
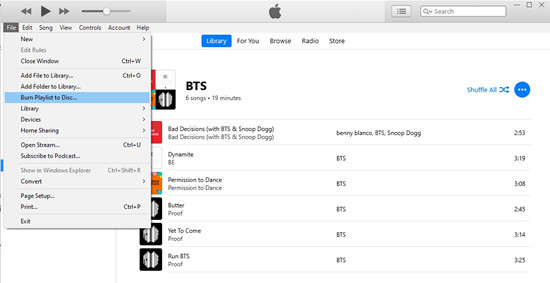
Step 5. Choose the disc format ( you can customize some other settings) and click Burn to start the process. Make sure to monitor the progress and ensure all items from the playlist are successfully burned onto the CD. If needed, insert another blank CD to continue burning extra items.
After these simple steps, you will soon have your favorite Apple Music tunes burned on your CD.
Conclusion
To sum up, we have explored how to burn music CDs on Apple Music using both Windows and Mac systems. Regardless of the platform, the pivotal step lies in using a music converter to strip away the DRM protection from Apple Music files, so that users can transfer their desired tunes onto CDs without a hassle.
By using MuConvert Apple Music Converter, users can effortlessly convert M4P files to CD-compatible formats like WAV and MP3, enjoying high-speed conversion and exceptional audio quality. Also, you don’t need to edit the downloaded files’ info because it saves the original ID3 tag info for easy music management. With all these merits, are you sure you don’t want this helper? Let’s go forth with it!
