
February 11, 2024
Windows
Create A Bootable USB Stick
In order to install window from a USB Drive, you need to make it bootable so that your system BIOS can support it. If a USB is not bootable then your system BIOS will not be able to boot the USB and let you install the window from it. A bootable USB allow you to install windows faster as compare to the CD and DVD.
After creating a USB bootable you can install windows xp, vista and 7 easily. However in this tutorial i will show you that how can you create a usb stick bootable. In my upcoming article i will write about that how you can install windows 7, xp or vista through USB.
How to Create USB Stick Bootable?
1. Insert your USB in the port and make sure that you backup all its data in your hard drive.
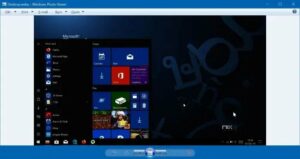
2. Click on Start>All Programm>Accessories and Right click on Command Prompt, and click on Run As Administrator option.

3. After clicking on Command Prompt, type the following commends and press Enter.
DISKPART
After the code is applied, enter the follow code and press enter.
list volume
This will show you the list of all USB that are currently plug in the ports. Select the USB you want to create bootable. Type the name of your USB and press Enter.
The next step is to make this USB active. Just type the commond active and press enter.
Make Sure to Format your USB in NTFS format.
4. Now exit from the DISKPART by typing exit command.
5. Enter the below command in the Command Prompt.
bootsect /nt60 G:
Here copy all the setup files of your windows in your USB and it will be bootable. You can now install window from your USB as it is bootable now.
Hope you like the tutorial, feel free to share your comments.

Bilal Ahmad
Founder & Editor, TechMaish
Bilal Ahmad is the founder and editor of TechMaish, writing about consumer technology since 2008. For over 18 years he has covered streaming and downloads, games, social media platforms, iPhone and Android, Windows fixes and everyday software, testing tools hands-on and sharing what actually works. He is based in Peshawar, Pakistan.
About MeAll My ArticlesTwitterFacebookLinkedInInstagramPinterest